The holiday festivities this year are a bit different due to California’s stay-at-home order but that doesn’t mean you can’t inspire some holiday cheer at home.
These homemade holiday activities can be a fun and affordable way to crank up the cheer.
Make and Bake
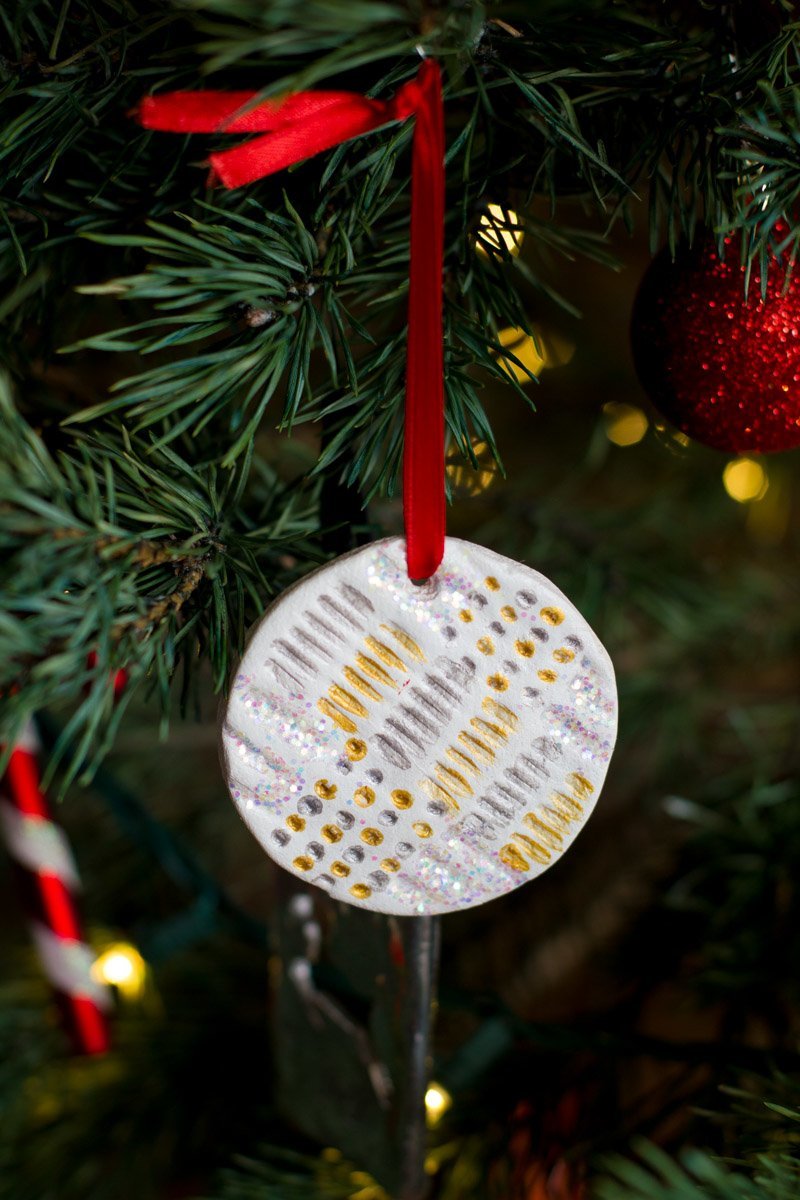
Flour, a mixing bowl, and the oven aren’t always a combination that yields cookies. This inedible craft utilizes these ingredients to make a fun long-lasting ornament that is definitely not made to eat.
According to Wholefully.com, you will need 4 cups of flour, 1 cup of salt, 1 ½ cups of warm water, parchment paper and decorative elements like glitter, paint, sequins, and ribbon.
1. Your child can help whisk together the flour and salt in a large bowl. While you slowly add in the water, direct your child to continue whisking the mixture. Finish mixing the ingredients together with your hands, kneading for about five minutes until dough is soft.
2. After you preheat the oven to 300°, place half of the dough between two large pieces of parchment paper and roll it out until it’s less than a quarter inch thick.
3. Remove the top sheet of parchment and instruct your child to use cookie cutters to cut out shapes from the dough. Peel away the excess dough and transfer the parchment paper with the cut-outs onto a baking sheet.
4. Using a straw or toothpick, poke a hole for ribbon or an ornament hanger.
5. Put the tray in the pre-heated oven and bake for about an hour until the shapes become hard.
6. Once the shapes cool off, you and your child can decorate the white shapes using glitter and paint.
7. Thread a ribbon or string through the hole you made with the toothpick, knot the ribbon and hang the ornament on the tree, a hook on your mantle, or the handle of a drawer for some holiday glee.
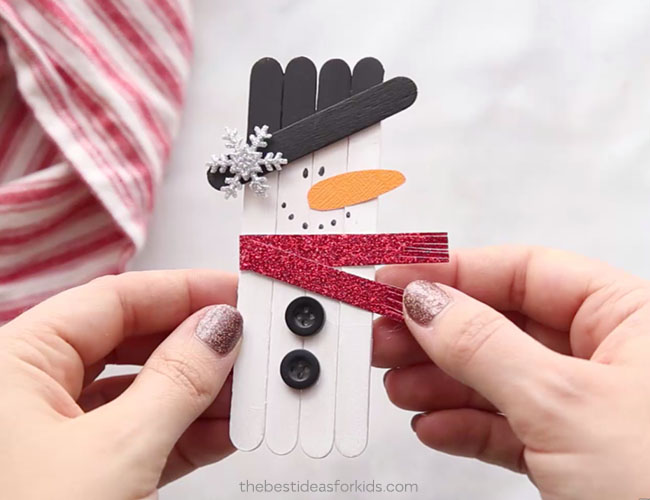
Popsicle Stick Snowman
California’s warm climate isn’t exactly conducive to building snowmen but luckily this craft doesn’t require cold weather or snow to make your own Frosty the Snowman. To make this craft from TheBestIdeasForKids.com, you will need popsicle sticks, glue, string, paint and a paintbrush.
1. If you’re using non-toxic white glue, your child can glue together six popsicle sticks edge-to-edge so that it looks like a small fence. If you’re using hot glue, do this step for your child so he or she doesn’t get burned.
2. With the row of glued sticks standing vertically, glue a seventh stick horizontally across them about 1 inch from the tips to make the brim of the snowman’s top hat.
3. Once the glue dries, paint the sticks below the horizontal one white and everything at and above the horizontal stick blue. Help your child make dots for eyes and the mouth using the black paint. Then paint an orange carrot for the nose.
4. Once the paint has dried, you can glue a piece of string from edge to edge behind the “hat” to create a hanger. This can make a fun decoration for your front door or any hook in your home.
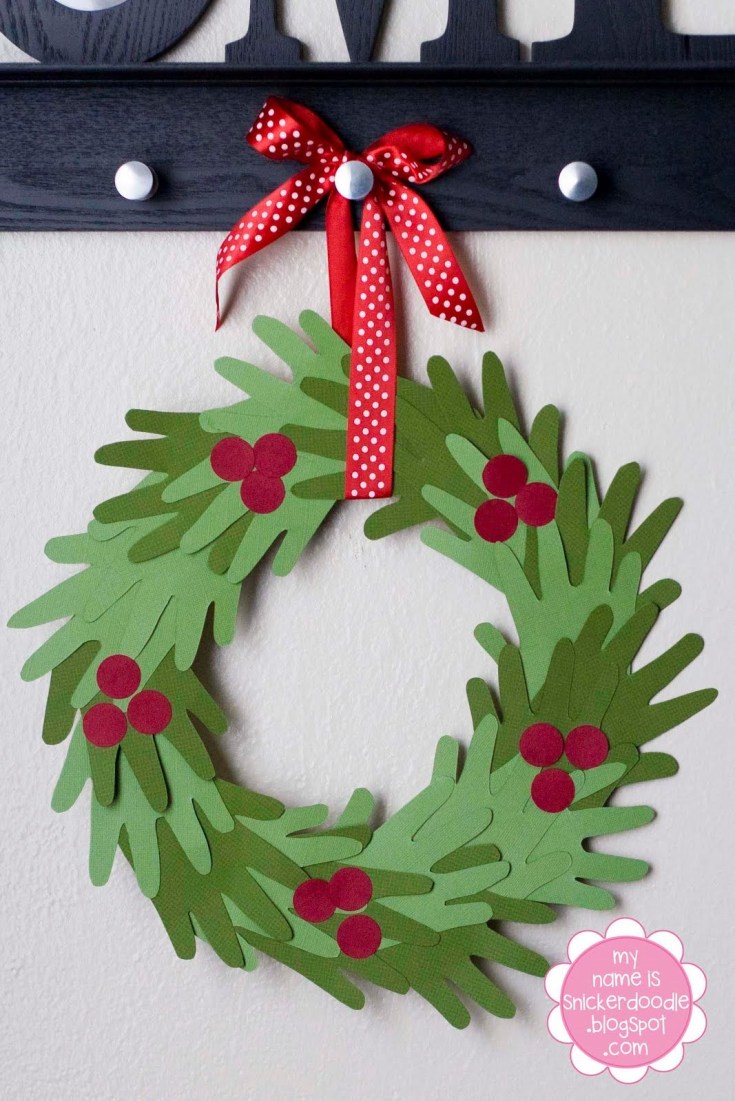
Hand-Made Wreath
This craft is not only fun for children but a great time-stamp for parents because the child uses his or her small hands to trace on the paper. You will need green and red construction paper, scissors, glue, and a ribbon or string, according to HappyHomeFairy.com.
1. Instruct your child to trace his or her hand on the green paper, making about 10 hand prints.
2. Once the hands are all traced, you can help your child cut out the traced handprints.
3. Use the glue to attach the “hands” palm to fingertip in a circle until you have a complete circle, which is the wreath.
4. Now have your child trace a circle around a quarter on the red construction paper to create the holiday berries for the wreath. Again, help your child cut out the traced circles and then glue them onto the wreath in clusters of two or three.
5. Once the glue on the wreath is dry, loop the ribbon through the center and over the top, tying the ends in a bow. Now the wreath is ready to hang from a nail on the front door or be used as a centerpiece at the table.