
If you are looking for ways to entertain your tiny tot and save the environment, check out the activity below. We cannot guarantee your environmental impact, but we know for sure you and your little one will have fun! Please be advised, this activity does involve scissors and a hot glue gun. A parent should be present during this activity. We’d like to thank, Parents.com, for this awesome suggestion. If you try this activity, be sure to share it with CCRC on social media. You can find us a @CCRC4Kids. Enjoy!
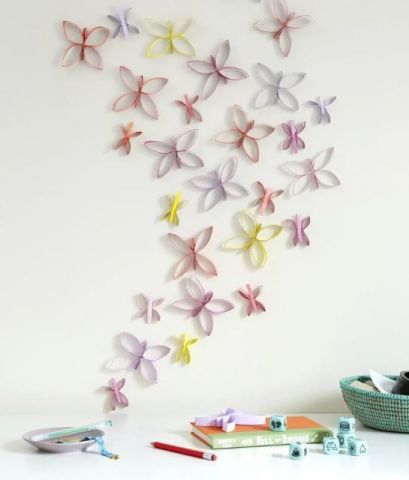
A kaleidoscope of butterflies, no one will believe is only made of paper.
Here’s what you’ll need.
- Toilet- and/or paper-towel tubes
- Hot-glue gun or adhesive dots
- Poster putty or poster board
- A pair of scissors
Directions:
1. Paint your tubes! Let your child go crazy, the more colorful your tube, the more color your future butterfly will be. Then let the tubes dry completey. The more paint you use, the longer it will take them to dry.
Teachable moment: Encourage your littles to mix and match their paints to see how many new colors they can make.
2. Flatten the tubes and use scissors to cut them into slices. For a large butterfly, you will need five ⅝-inch-wide slices. For a small butterfly, you will need two ½-inch-wide slices and one ¼-inch-wide slice. Feel free to estimate your measurements. Exact measurements are not required.
 Teachable moment: Use this opportunity to talk to your tots about size and measurements. If you use a ruler, you can point out the difference between inches and centimeters. Moderate your conversation depending on the age of your child. Simply pointing out one is bigger than the other is influencing your child in such a positive way.
3. To construct the small butterfly: Fold two ½-inchwide slices in half; unfold. Add a dot of hot glue (an adult’s job) to the inside center of each and refold to make a set of wings. Glue the two sets of wings to the sides of the ¼-inch-wide “body”.
4. To construct a large butterfly: Add a dot of glue to the inside center of one of the ⅝-inch slices and squish it together to make a “body.” Add a dot of glue to the flat side and press on another slice for a wing, as shown. Repeat for other three wings.
5. To assemble: Arrange the butterflies on the floor first; use poster putty to attach them to the wall. Alternatively, you can use your glue gun, and stick them to a poster board. Let your child choose where they would like to display their artwork!