
Summer is just around the corner, and what better way to prepare for those warm days than a nice scoop of homemade ice cream! This is a great, mess free activity for you and the kids.
Each step includes a teachable moment. Everything we do is science and it’s never too early to start getting kids excited about new things. When kids grow up in science-friendly homes, they are encouraged to ask questions, use critical thinking skills, explain their reasoning, read, write, create models, and get out and experiment.
What you will need for 1 serving.
Ice Cubes
½ cup of Kosher salt
1 cup of half and half milk (add chocolate syrup for chocolate ice cream)
2 tablespoons of sugar
½ teaspoon vanilla extract
1 pint-size zip lock bag
1-gallon size zip lock bag
Any of your favorite ice cream toppings (This is where it gets fun! You can add nuts, sprinkles, gummy bears you name it.)
Let’s make ice cream!
Step 1: Measure Ingredients
Combine the half and half milk, sugar and vanilla extract in the pint size bag. Seal the bag tightly, so none of the liquid will leak out.
Teachable Moment – Use this time to talk to your kids about measurements. For instance, the difference between 1 cup and a ½ of a cup.
Step 2: Prepare Ice Bag
Fill the gallon size zip lock bag halfway with ice cubes. Sprinkle Kosher salt over the ice cubes.
Teachable moment; You can use this time to talk to you child about shapes and sizes. For instance, the ingredients’ bag is smaller than the ice bag. The grains of salt are a lot smaller than the ice cubes.
Step 3: Bag it up!
Insert the pint size bag filled with ingredients into the bag of ice and salt. Seal the gallon sixe zip lock bag. Double check to make sure both bags a closed tightly.
Teachable Moment: You can use this time to talk with your child about the 3 states of matter, solid liquid and gas. Your child will witness the ice cream mixture transform from a liquid to solid.
Step 4: Let’s shake!
Shake the gallon sized zip lock, which contains your smaller ingredients bag, for about 5-10 minutes until the ice mixture begins to harden. Feel the small bag to determine the consistency of your mixture. Once satisfied, remove the small bag.
Teachable moment: This would be a good time to talk with your child about friction. Friction is the action of one surface rubbing against another. During that process heat and/or energy is transferred. Feel free to explain by rubbing your hands together.
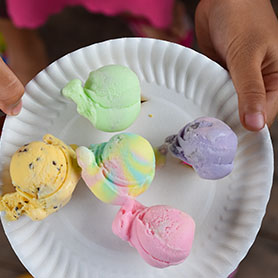
Step 5: Enjoy!
Open the small zip lock bag and add any desired toppings. Feel free to eat the ice cream straight from the bag or transfer it to a desired serving dish.
The science behind the experiment:
Water has three states: solid, liquid and gas. Water changes into its solid state when it reaches 0 degrees Celsius (32 degrees Fahrenheit), but if there is Sodium Chloride (NaCl), also known as salt, present that temperature drops. Salt lowers the freezing point of water. The cooler temperature of the ice and salt mix, which surrounds your ingredients bag, is cold enough to change the state of the cream from a liquid to a solid, hence the name ice cream!
Want some more fun!
For you more experienced ice cream lovers, try following the video below. You only need two ingredients, but the options are limitless!